Friday 26 February 2010

Da Font (Snow day activities -part 2)

I like to encourage my children to draw and colour in pictures as much as possible, but even I have to agree that there are some uninspiring kids colouring books and printable websites out there. I discovered the website Da Font (a free to download font website) a few years back, when I grew tired of the default fonts Microsoft supplied you with and wanted some fresh ideas. The Dingbat category (a type of font that uses small pictures instead of letters) is inspired!

yesterday I down-loaded a few funky fonts, opened a Word Document and let the little peeps rip - Lego was their Dingbat font of choice, but honestly there are hundred to choose from.


I converted a few of the docs into paint files and showed then how to use the 'fill tool' - very satisfying.

P.S - let me know if you need help with the technical side of installing fonts, and I'll do a quick tutorial.

This Week

Snow days are good for art......


...and alcohol is good for the heart


Thursday 25 February 2010

Snow day..

The Schools were closed today in our part of Aberdeenshire after a day of mad snow storms yesterday. The weather has been pretty filthy outside again today, so I knew a day of indoor activities was on the cards with the little ones. Two ideas in particular hit the mark with my two boys (aged 5 and 7) who are both quite active lads, and crafting with them is usually a challenge in itself.

Idea 1- Recycling old Grotty Crayons.
I have seen this idea on the Martha Stewart website, but have never got round to doing it - so thank you HelloCayce for reminding me of the idea on your blog this morning!

Look out your collection of old, broken crayons.

Peel off the paper wrapping and snap up into small pieces.

Find some oven proof moulds, I used some little silicon cupcake cases, but your could use a muffin tin.

Fill up the moulds with the broken crayons and pop in the oven (coolish setting, around 150 degrees centigrade) until melted (about 10 mins)

Once melted, remove from oven and allow to cool down and set in moulds.

and there you have it, a very lovely set of new crayons - my two LOVED the whole process of making these!

(idea 2 to follow tomorrow)

Thursday 18 February 2010

Cupcakes in the Post today!

This beautiful felt garland arrived for me in the post today - Thank you my Dear one !
Cupcakes and Hearts, I can think of no sweeter combination....

Wednesday 17 February 2010

Acorn hat Pattern - or how to make up your own design

I posted a photo of my acorn hat on the crochet board of Craftster, and was asked if I had a pattern to go with it. Well, I guess I just made it up as I went along, but if you know the basic principles of crocheting on the round, making a hat is very easy. So I have jotted down some steps for you to follow to make up your own hat pattern:-
Basic Hat pattern Instructions

begin by crocheting a flat circle,* until it is the diameter of the crown of your head (approx 15 -20cm)

Once you have reached your required diameter, continue to crochet around and around and around...until desired length

If you want your hat shape to look a bit more like this (as I did with the acorn hat) Decrease stitches as you crochet down. Make sure you decrease evenly for a uniform shape, but not too much or it will be too tight!

If you'd prefer a more A-line hat, Increase your stitches gradually as you work down

Keep trying on your hat as you go, that way you'll know if you need to decrease/increase stitches, and you should get a perfect fit.
I used very chunky yarn for the acorn hat and made it longer in length to allow for a brim to be turned up. For the stalk at the top, I broke off my wool once I had completed the hat length, and rejoined at the first round on the top of the hat (6 stitches) and crocheted another 6 into them and then went around and around the 6 stitches until my stalk was the desired length.
*Note*
How to crochet a flat circle
R1: Ch2, 6sc in 2nd ch from hook (6)
R2: Sc 2 in each Sc around (12)
R3: *Sc 1, 2sc in next sc* x6 (18)
R4: *Sc 2, 2sc in next sc* x6 (24)
R5: *Sc 3, 2sc in next sc* x6 (30)
R6: *Sc 4, 2sc in next sc* x6 (36)
.....and so on, you will see a pattern forming, each round is increased by 6 stitches. I find I do have to count the stitches as I am crocheting at this point.
I hope this has all made sense to you, please email me if you require any help or clarification.

Tuesday 16 February 2010

Squirrels and Scribbles

Fab Valentine's Day trip to the Royal Botanic Gardens in Edinburgh featuring squirrels and a chance to hang a wee expressive moment on a willow woven dome inside the beautiful John Hope Gateway.


Monday 15 February 2010

Acorn Hat for Pixie Girl

I am always deeply flattered when someone asks me to crochet something for them, so when my sister Jill (PixiePeg crafts) asked me if I would mind making an acorn hat for her I was thrilled (if a little nervous) at the challenge. In the end I decided to use a chunky wool mix yarn in a nice brown shade. Because the wool was chunky, it made up in no time, although as always when you can't see a person to measure as you go, I was worried the hat wouldn't fit..


I didn't use a specific pattern for the hat, but if you know the principles of crocheting 'on the round' it is quite simple. I used a single crochet stitch, which I thought gave a nice natural textured weave, and made it long enough to roll up a brim at the bottom, and finally made a short stalk on the top.
Jill phoned me today to thank me for the hat I had posted to her, and I was relieved to see it fitted.

Thanks for the photo Jill, it suits you (see Jills Blog for more photos)

Tuesday 9 February 2010

I ♥ Hearts

I have a big thing for hearts - their curvy shape, symmetry, lush red colour and the country cottage feel they can lend to a home. If you were to come round to my house, you would notice them dotted in practically every room.

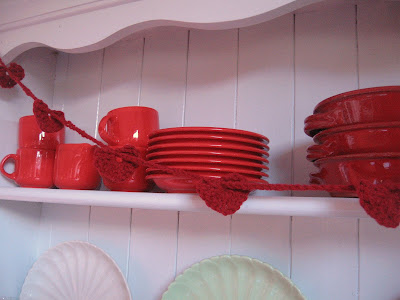
I love this heart garland I made to decorate my dresser at Christmas time, so much so much it never came down. Click here for this great pattern on the blog Suzie's Stuff.

I have been trying my hand at a pattern for a 3d crochet heart, and I have to admit, I am finding it tricky to get my heart symmetrical!

There are many patterns on the Internet for crocheted hearts, but I found this one the simplest to follow at Instructables. A bit more practice I fear before the 14th!

Monday 8 February 2010

The Kindness Offensive

I love the ethos behind The Kindness Offensive - a London based movement who state their objective as, 'to create projects that are fun, inspiring, and which leave the world better than we find it.' What an ace thought to start the week with.

Wednesday 3 February 2010

Lacy, Chunky, Cardigan

I have found it a challenge to find crochet patterns for nice, light cardigans that also flatter when worn and so have found myself returning to this one time and time again. This is the 3rd time I have made this cardigan, and as all were made using very different yarns and colours, they have all turned out differently. The pattern is called Chevron Lace Cardigan, and is published on 'Without Seams' blog (very inspiring and talent soaked!). I found it via Ravelry, it's probably the most popular cardigan pattern on Ravelry, and no wonder as it is such a breeze to make. It's a top-down style pattern which means the garment is made in one complete piece , top downwards.

I had planned to make this one longer in length and in the sleeves, but unfortunately ran out of yarn, but I reckon it'll still come in use for layer, wearing on top of dresses etc..

Oh, yes and the sun was shining today when I took these photos - Bliss! roll on Springtime (of course we need the Snow to melt first!) and new cardigans!!!

Tuesday 2 February 2010

Sometimes....

Sometimes it takes me a while to get round to finishing things. Eight years ago, pregnant and desperately seeking distraction from all engulfing nausea, I started weaving some pressed strips of fabric and promised myself I'd make something fantastic that would be enjoyed for years to come. The woven strips were secured together with a lot of ironing and a whole lot more wonderweb; I was still convinced sewing machines hated me back in '02. Amazingly, I ended up with two rather pleasing woven panels which were largely useless but looked nice.


I kept one of the pieces for myself (currently residing in the loft - shame on me) while the other piece went to my Mum. She placed it proudly on her sofa arm and admired it a while and then (to her mortification and my shrieks of laughter) she spilled red wine on it and hushed it away affrontedly into a drawer while we pondered how best to clean it.


Last weekend I was searching for sewing inspiration amongst my remnants and there it was... enticingly half finished and Daffodil sunny, peeking out from behind a bag of curtain tape, waiting for an evolution, Mum's woven panel made mine again by her sad passing. It's now a cushion cover - all stabilised with real stitches, a history of its own and a comforting future ahead. It's a sweet reminder of my Mum, my daughter's journey into the world and some of the stories that have woven all three of us together in times gone by. Truly precious, to yours truly. Here it is playing artistic homemade pillow pile up with it's friends...........


Sometimes I see something simple and fantastic and can't wait to get stuck in. That's exactly what happened when I saw a totally cool Valentines Day sachet on Whip-up.net I didn't have any felt in my stash but, itching to produce something on the back of fresh inspiration, I decided to go on some sewing adventures with the lightweight sheets of funky foam the kids like to chop up. So far I've made husband's Valentine's day card and am working on what I anticipate will be the first of many sachets as per the brilliant Whip-up.net instructions. I've ground to a halt at the section that requires me to get the iron out. I'm hoping this mental block will pass soon so watch this space and enjoy the eye candy on the Whip-up tutorial meantime.